The Elegoo Mars is my first step into the world of 3d printing.
Specifications
Printer
ELEGOO Mars UV Photocuring LCD 3D Printer
Dimensions
7.87 x 7.87 x 16.14 inches (20 x 20 x 41cm)
Build Volume
4.7″ x 2.6″ x 6.1″ (120 x 68 x 155mm)
Printing
Photopolymer Resin
Interface
Touchscreen
LCD
2560×1440 2K HD masking LCD
UV
40W
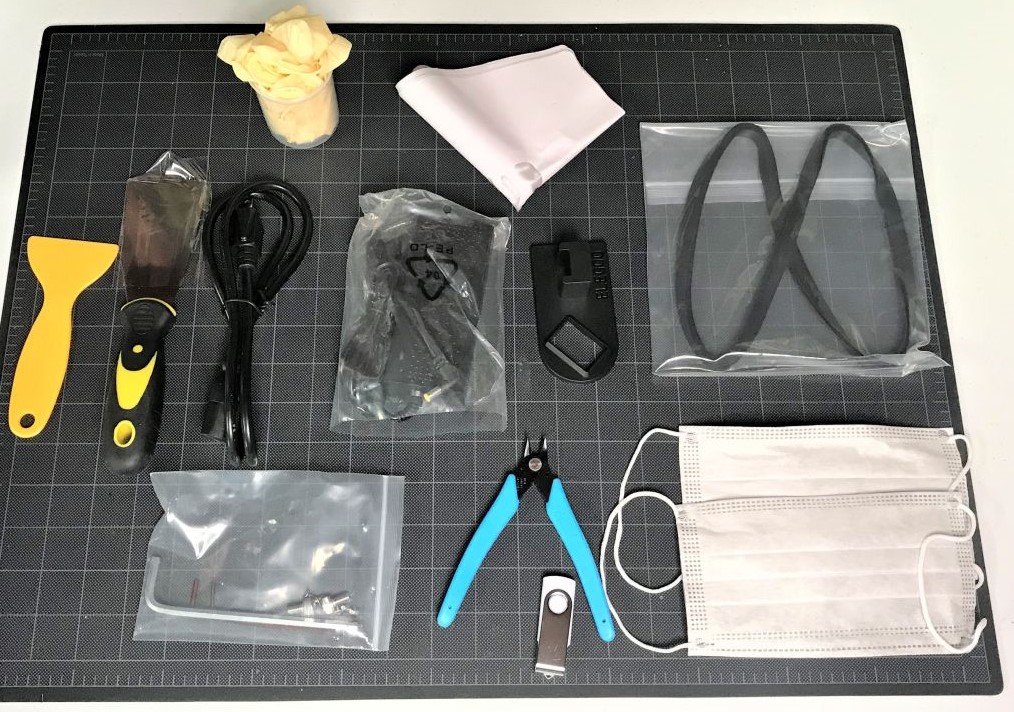
What’s in the box.
The Elegoo Mars Printer
UV Cover
Build platform
Power Adapter
Instruction Manual
Tool Kit
Gloves
Masks
Filter funnels
Hex keys
Measuring cup
Wire cutters
Scraper
Flash drive
The print quality on the Elegoo Mars is incredible. This printer gives higher-priced competitors a run for their money. The X/Y resolution is 0.00185″ (0.047mm), so the quality on everything you print is already miles ahead of your standard FDM printer. Here’s a quick comparison of the same castle printed on an FDM printer next to one printed on the Mars.
The Elegoo Mars leans on the smaller side. It doesn’t take up much space and offers a small build volume. But that isn’t necessarily a downside! The price factor and performance more than makeup for the size.
The Elegoo Mars design is remarkable given the price. The aluminum base lines up perfectly with the orange UV cover—it looks really sleek on a workbench but your taste may vary. It has a relatively small footprint, taking up a 7.87″ x 7.87″ (20cm x 20cm) square space and reaching 16.14″ (41cm) high.
You’ll find a touch screen interface on the front of the base. It’s pressure-sensitive, which is always welcome when you’re working in nylon gloves. The UI is easy to navigate and intuitive in design. Everything you would expect is available—basic printer settings, leveling tools, and access to the flash drive storage.
Prints are loaded onto a flash drive (one is included with the printer) which can be plugged into the USB slot on the back of the printer. The back panel also houses the power button and power cord port.
Setup
There isn’t much to do in the way of assembly—the printer is shipped ready to use. The most you’ll have to assemble is the UV cover and build plate when pouring resin or removing prints.
Connect the Mars to power using the power adapter provided by Elegoo. The flash drive contains a test file that can be printed immediately. With the printer powered and flash drive connected, pour resin into 1/3 of the tank. Be sure to gear up with gloves and a mask before working with photopolymer resin. The test file can be selected using the touch screen interface on the front of the printer.
Setting up a custom print will involve the use of slicing software on a computer. Elegoo recommends using ChiTu Box to create printable files for the Mars.
When setting up for a print, the resin tank only needs to be filled about 2/3 of the way. If you run out of resin while printing an object, you can always pause the print to add more. For most small prints, you won’t need to refill the tank. But having that option for larger prints is always a plus.
The printing process on the Elegoo Mars can take a while so don’t expect to print build and paint in the same day.
Once the print is finished it will have to be cleaned with 99% alcohol. I highly recommend completely submerging your prints in alcohol to ensure the remaining residue is completely removed. Keep your gloves on for this progress.
I was very impressed with the test print even though it took around 4 hours.
As i said at the top, I don’t have any personal experience when it comes to resin printers but I have to say, the Elegoo Mars was so easy to use.
It was the perfect printer for me to dip my toes into the world of 3d printing. At only £180 its a great machine for beginners.